This week, we learned how to build a simple circuit using the Arduino Uno device. We set up a circuit in which a push button functioned as the switch, causing an LED light to turn on and off. Simple enough.
For homework this week, we were challenged to design our own switch. There were so many possibilities that I spent a good amount of time thinking about what kind of human interaction I wanted to initiate the switch. There are endless ways that we interact with our environment; for instance, poking, tapping, blowing, touching, and blinking.
Ultimately I decided that it would be interesting if the interaction were watering a plant. The action would complete the circuit, producing an outcome that would act as an alarm that the plant had received adequate water. In other words, I wanted to create a system where a plant starts yelling at you when you’ve overwatered it.

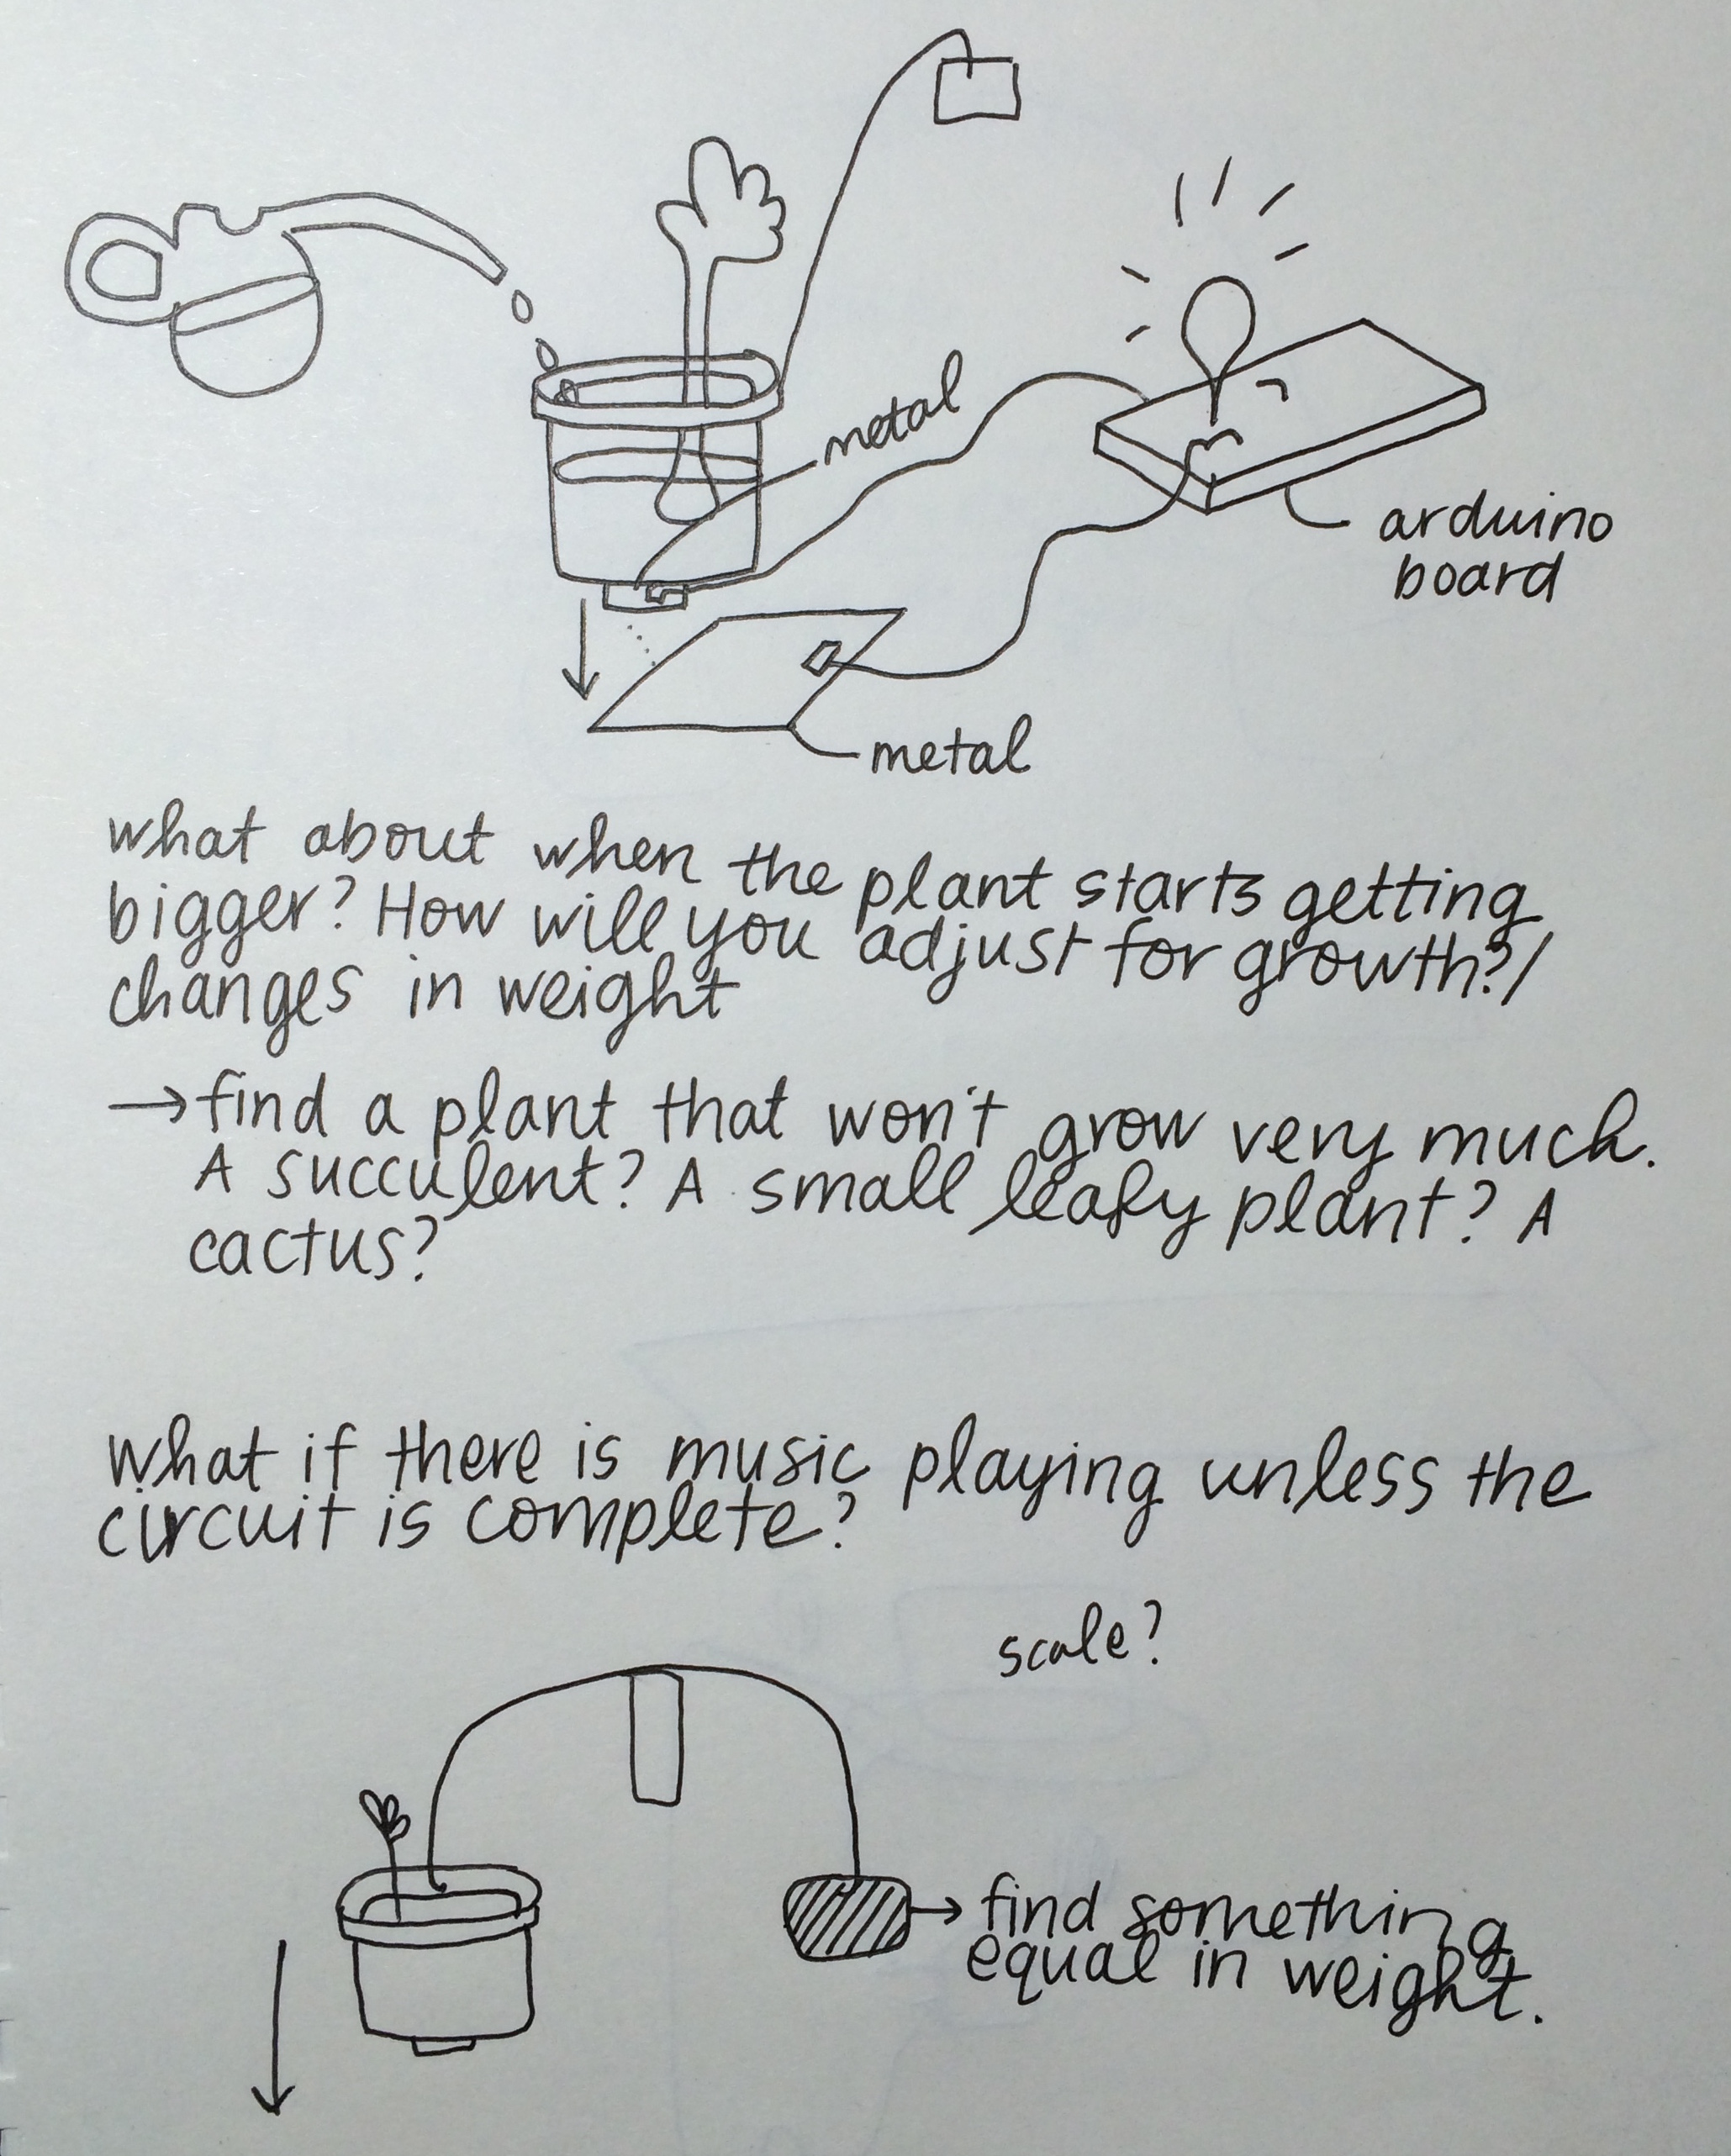
At first, I imagined setting up some type of pulley system in which the weight of the water pulled the pot down to the ground and connected a piece of metal on the bottom of the pot with a piece of metal on the ground.

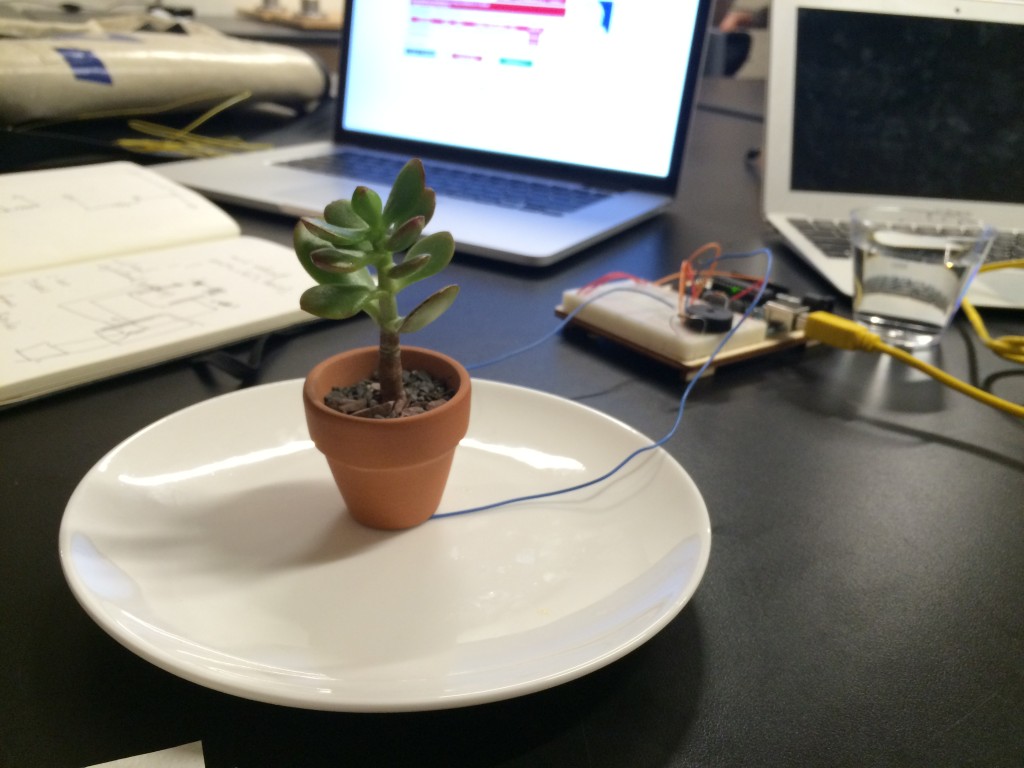
I quickly realized that a much simpler solution was available. Since water is conductive (to some degree – it does have resistance), I decided that I would put the plant on a plate and let the water trickle out of the bottom of the plant. The ends of the wires would sit on the plate and when the puddle formed, it would touch both of the wires and complete the circuit.

It took some trial and error, but I was able to complete a basic circuit using the plant watering action. One obstacle was that I had to dissolve some salt into the water in order for the water to be conductive enough to allow the electrical current to flow through the puddle (that’s probably a gardening 101 no-no). Another obstacle was that the wires kept oxidizing, which meant I had to keep snipping off the tops for each trial.
I jumped ahead in the lesson and learned how to set up a circuit that communicated with the Arduino software so that there was a digital signal sent back to a Piezo. To do so, I connected the wires so that the digitalRead() function would get its input from pin #7 and then the output would come out of pin #3, which was connected to the Piezo.

The result was that the Piezo played some sounds. I wrote some commands that played different tones on the Piezo. I really wanted to play the song “Psycho Killer” by the Talking Heads, so I wrote some code that produced a series of tones that corresponded to the chorus of the song.
The tone() function takes the pin # and a frequency number, which corresponds to a musical note. The delay() function is what creates the pauses between the notes.
Here’s what the full code looked like:
int sound;
void setup() {
pinMode(7,INPUT);
pinMode(3,OUTPUT);
}
void loop() {
sound = digitalRead(7);
if (sound==1) {
tone(3,440);
delay(500);
tone(3,440);
delay(500);
tone(3,440);
delay(500);
tone(3,440);
delay(1000);
tone(3,413);
delay(500);
tone(3,413);
delay(500);
tone(3,413);
delay(1000);
tone(3,390);
delay(500);
tone(3,440);
delay(500);
tone(3,390);
delay(500);
tone(3,520);
delay(1000);
tone(3,420);
delay(100);
tone(3,390);
delay(500);
tone(3,420);
delay(500);
tone(3,390);
delay(500);
tone(3,520);
delay(1000);
tone(3,390);
delay(500);
} else {
noTone(3);
}
}
Honestly, I wasn’t entirely successful at playing the Talking Heads song because it never actually ran the way I imagined it would, but I did succeed in getting the Piezo to play a really funny sound when the circuit was completed.
Here is the final product:
Watering a plant with Arduino from Rebecca Ricks on Vimeo.
One thought on “The plant that tells you when you’re overwatering it.”