
The aspirational version of my water harp.
The project I proposed last week was ambitious to say the least. In my project proposal, I stated that I wanted to build an entire interaction around the tactile experience of running one’s fingers through a stream of water.
In reality, there were a lot of obstacles I hadn’t anticipated encountering and I realized that the project I thought I’d be building required a longer time frame to test out ideas. I still love the concept but I will need to keep testing out the project before it moves forward.
Here’s what I built:
The (water) harp. from Rebecca Ricks on Vimeo.
That being said, I think I build something pretty cool even if it was only one piece of what I’d planned to build.
The initial plan.
After I nailed down the concept, I talked to Pedro about the different kinds of sensors that were available to me. We discussed some different potentiometers: photosensors, lasers, etc. Since I was really looking to build a series of simple switches, he suggested I keep things simple by using what is called an end switch. I decided that I wanted the water to fall on 10 switches. As the participant interacted with the water, it would trigger different sounds.

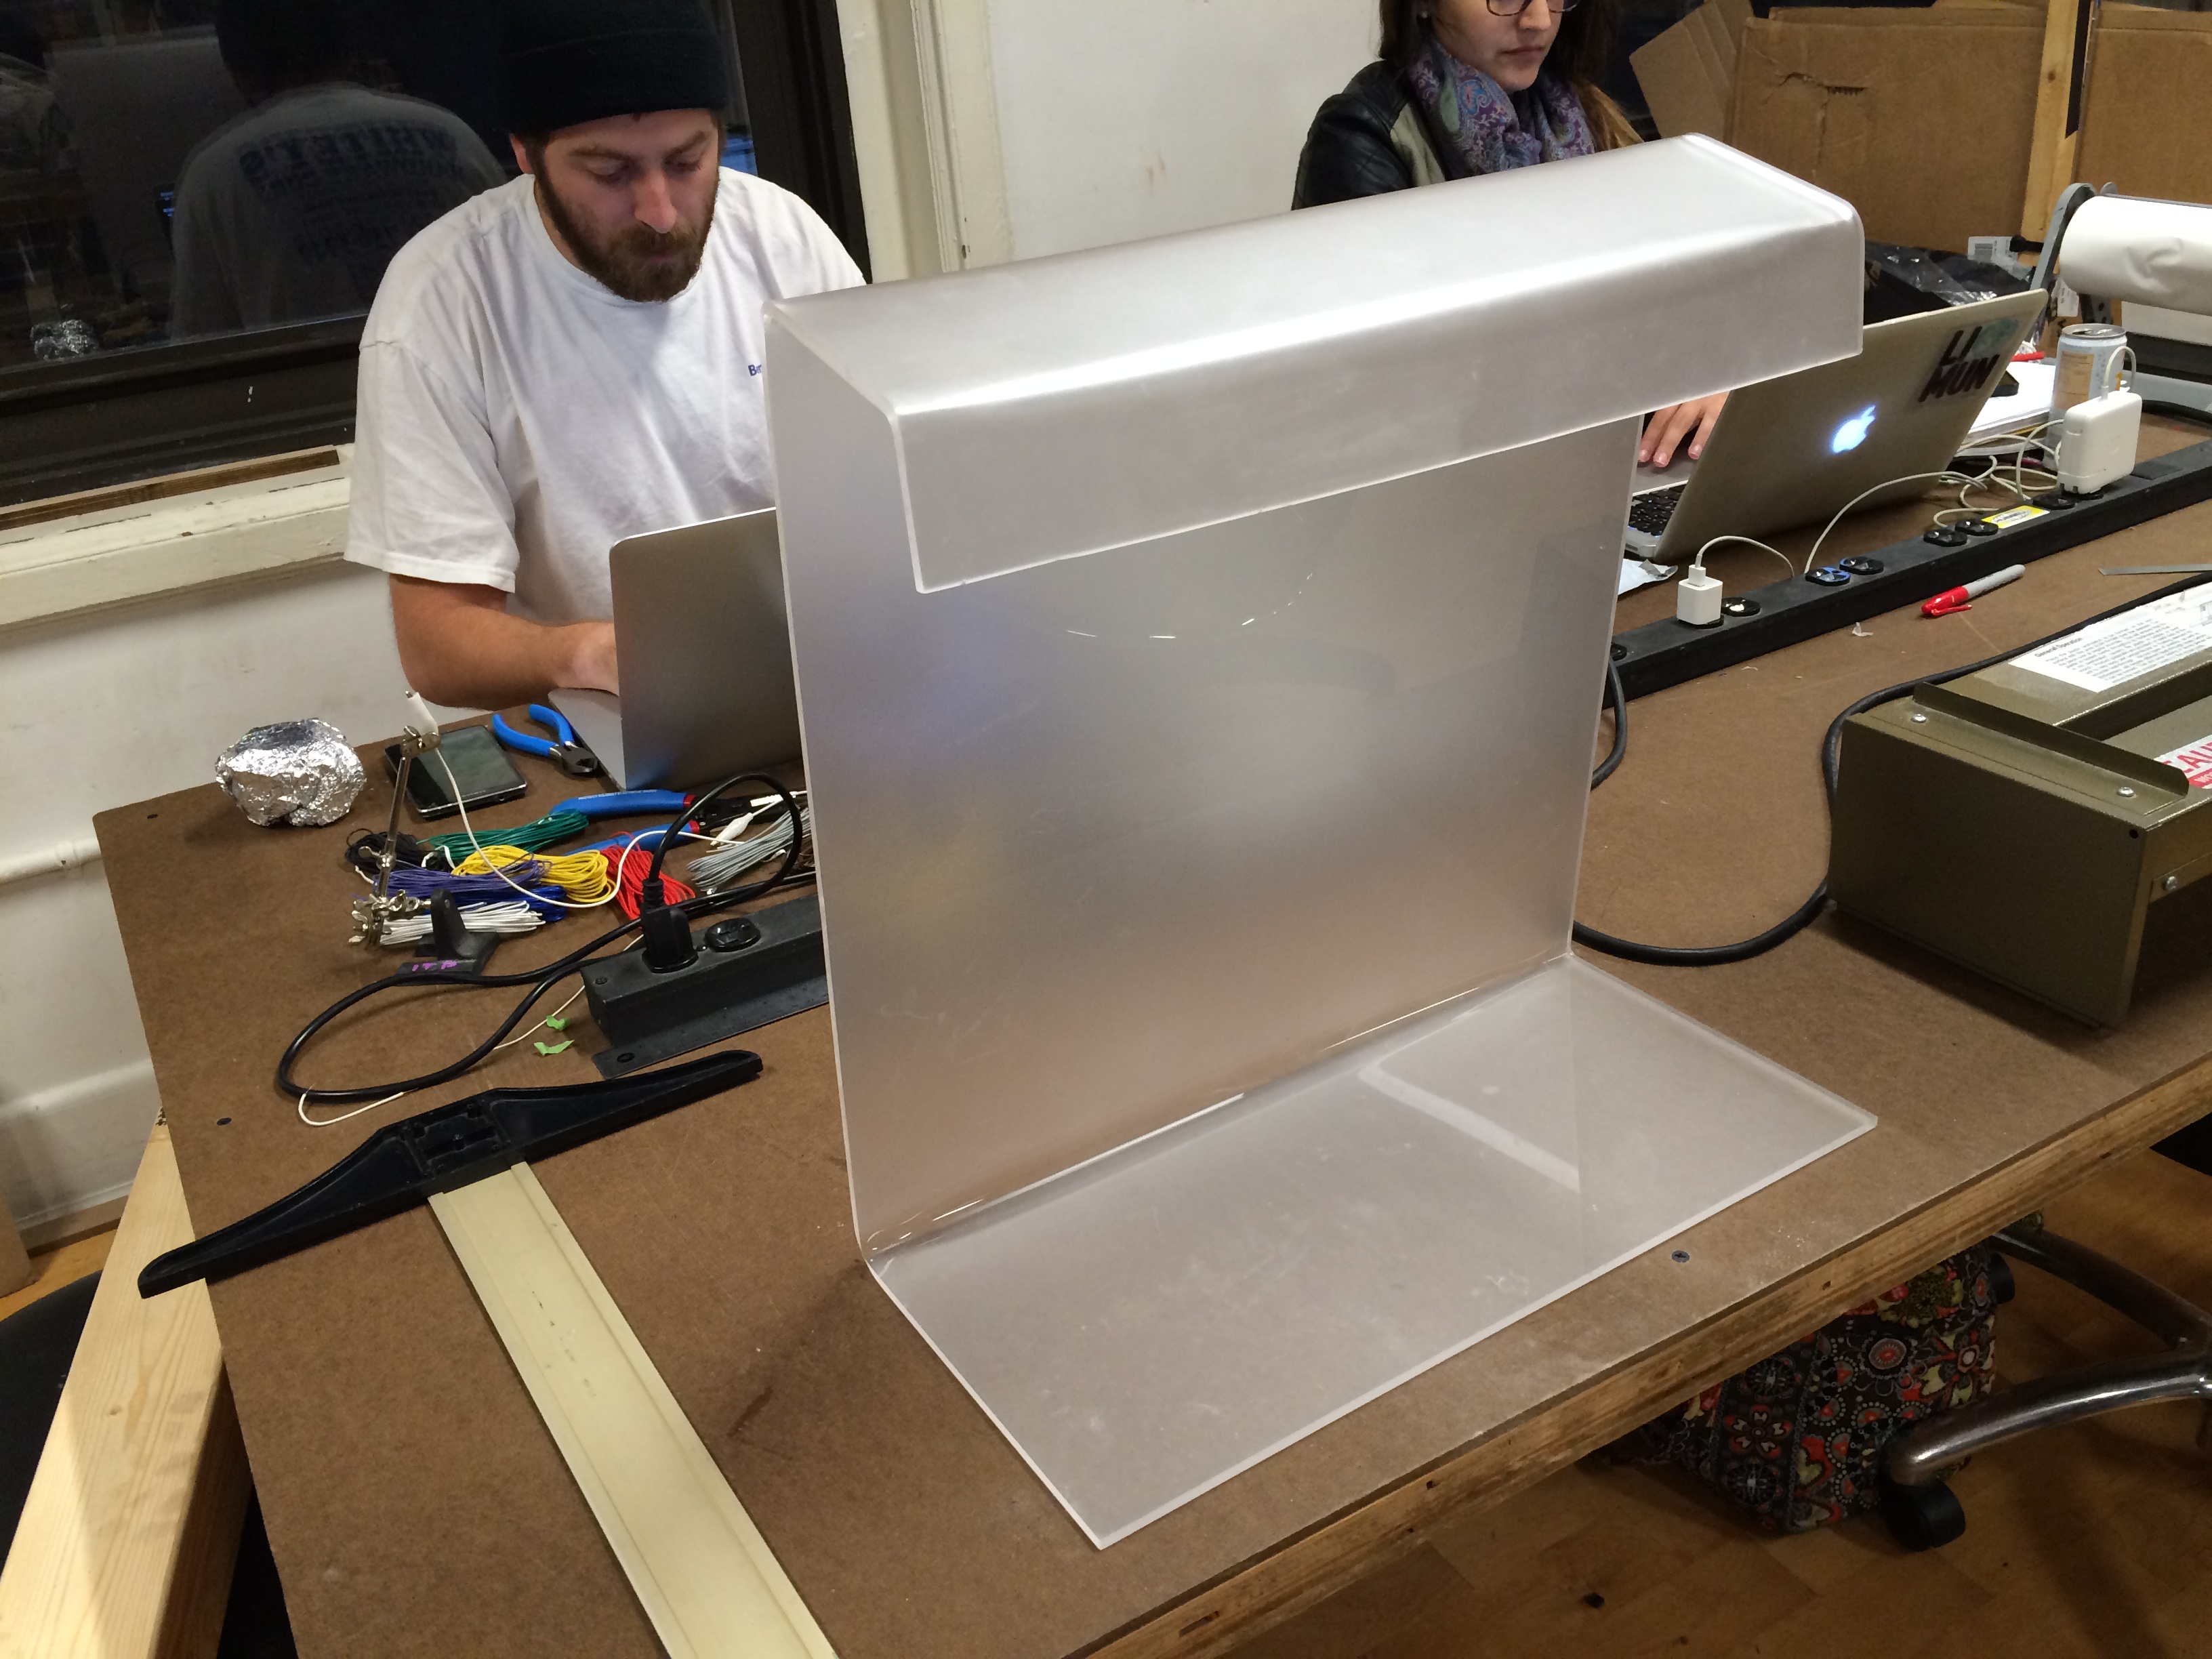
Step one: Fold the plexiglass into a shape that would create a waterfall wall of water.
I sketched out a few different ideas for the shape of the plexiglass. Ultimately I decided it would make the most sense to build a waterfall that would stand on its own and sit on a tabletop surface. Using the plastic heater, it was a laborious process to bend the plexiglass but I was able to get it into a shape that I liked.

Step two: Test out the waterfall with different configurations.
The initial plan was to set up a system whereby the water drips straight off the plastic into a container and is then pumped back up to the top and drips out a pipe with holes drilled in it. I set up the components – piping, pump, acrylic – and started testing the water.
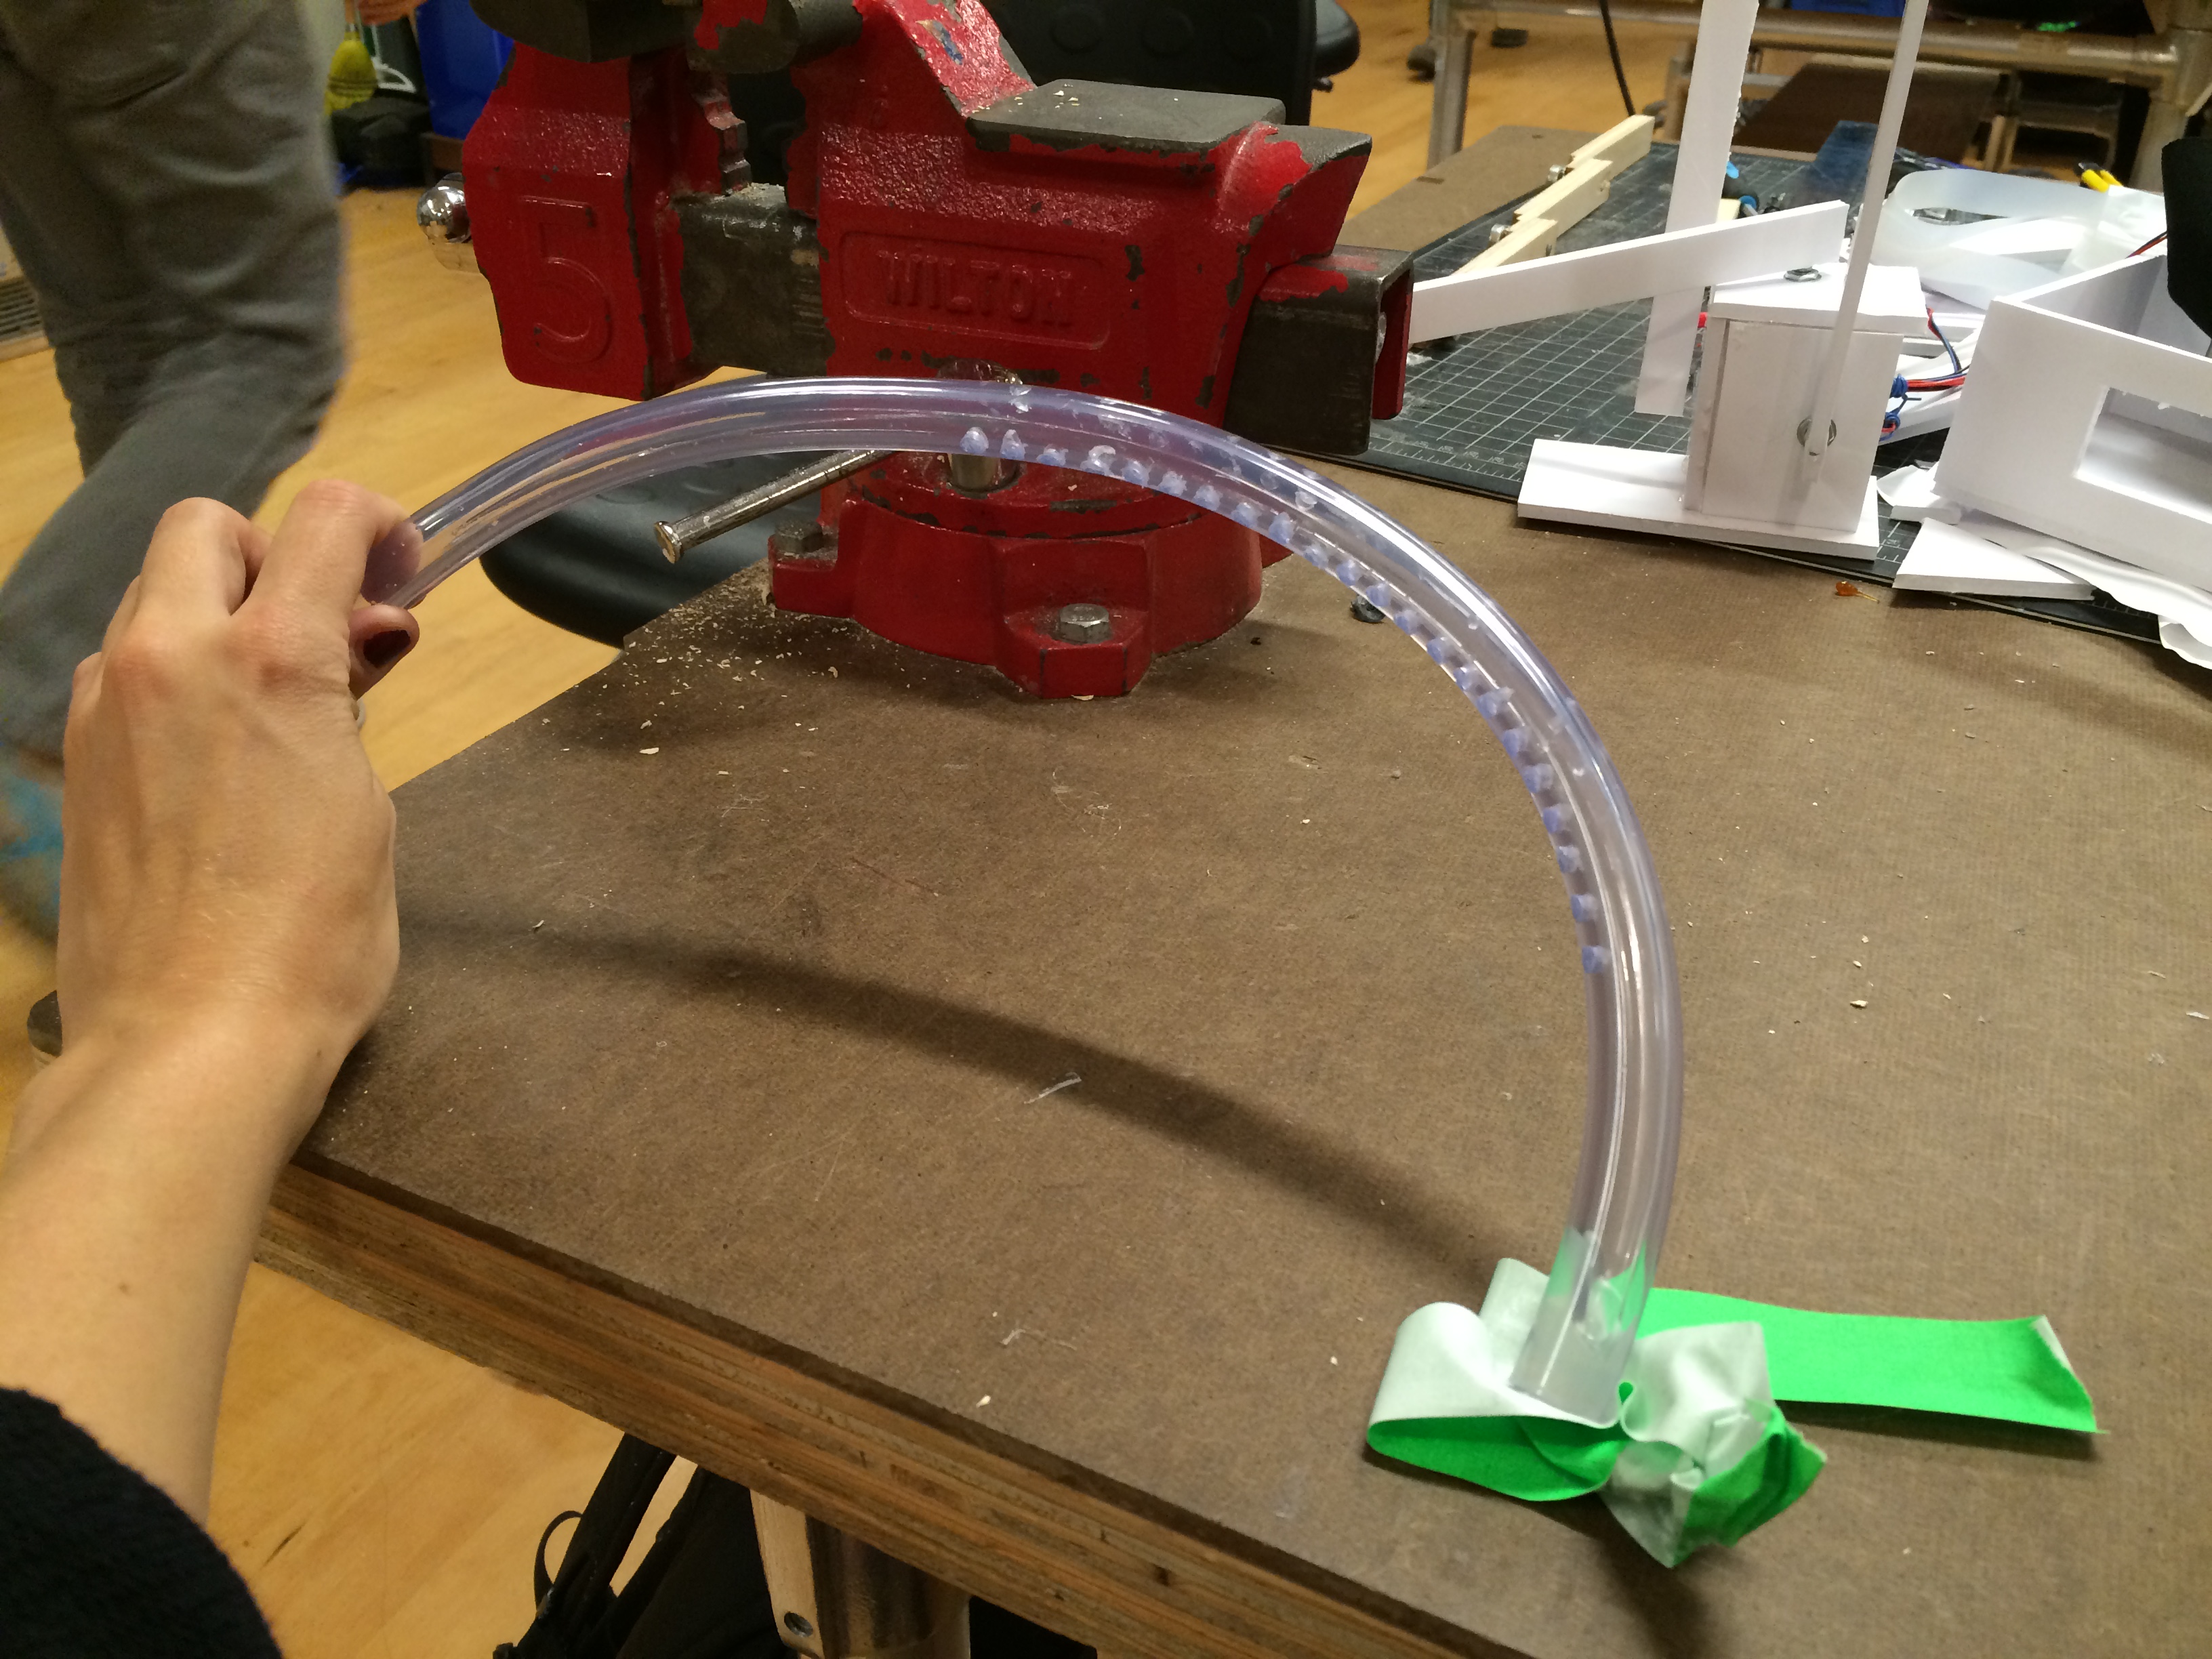
The result of my experimentation was extremely frustrating. It seemed like there were so many factors I had failed to consider when I’d decided to work with water. First of all, the water made a huge mess, which I hadn’t anticipated. More importantly, water has an affinity to plastic and acrylic and so I wasn’t getting the consistent blanket waterfall shape I’d planned on working with.
It seemed like everyone on the floor had ideas about hydrologics and water pressure. I tested out different materials for making a lip for the acrylic but nothing seemed to even out the stream.
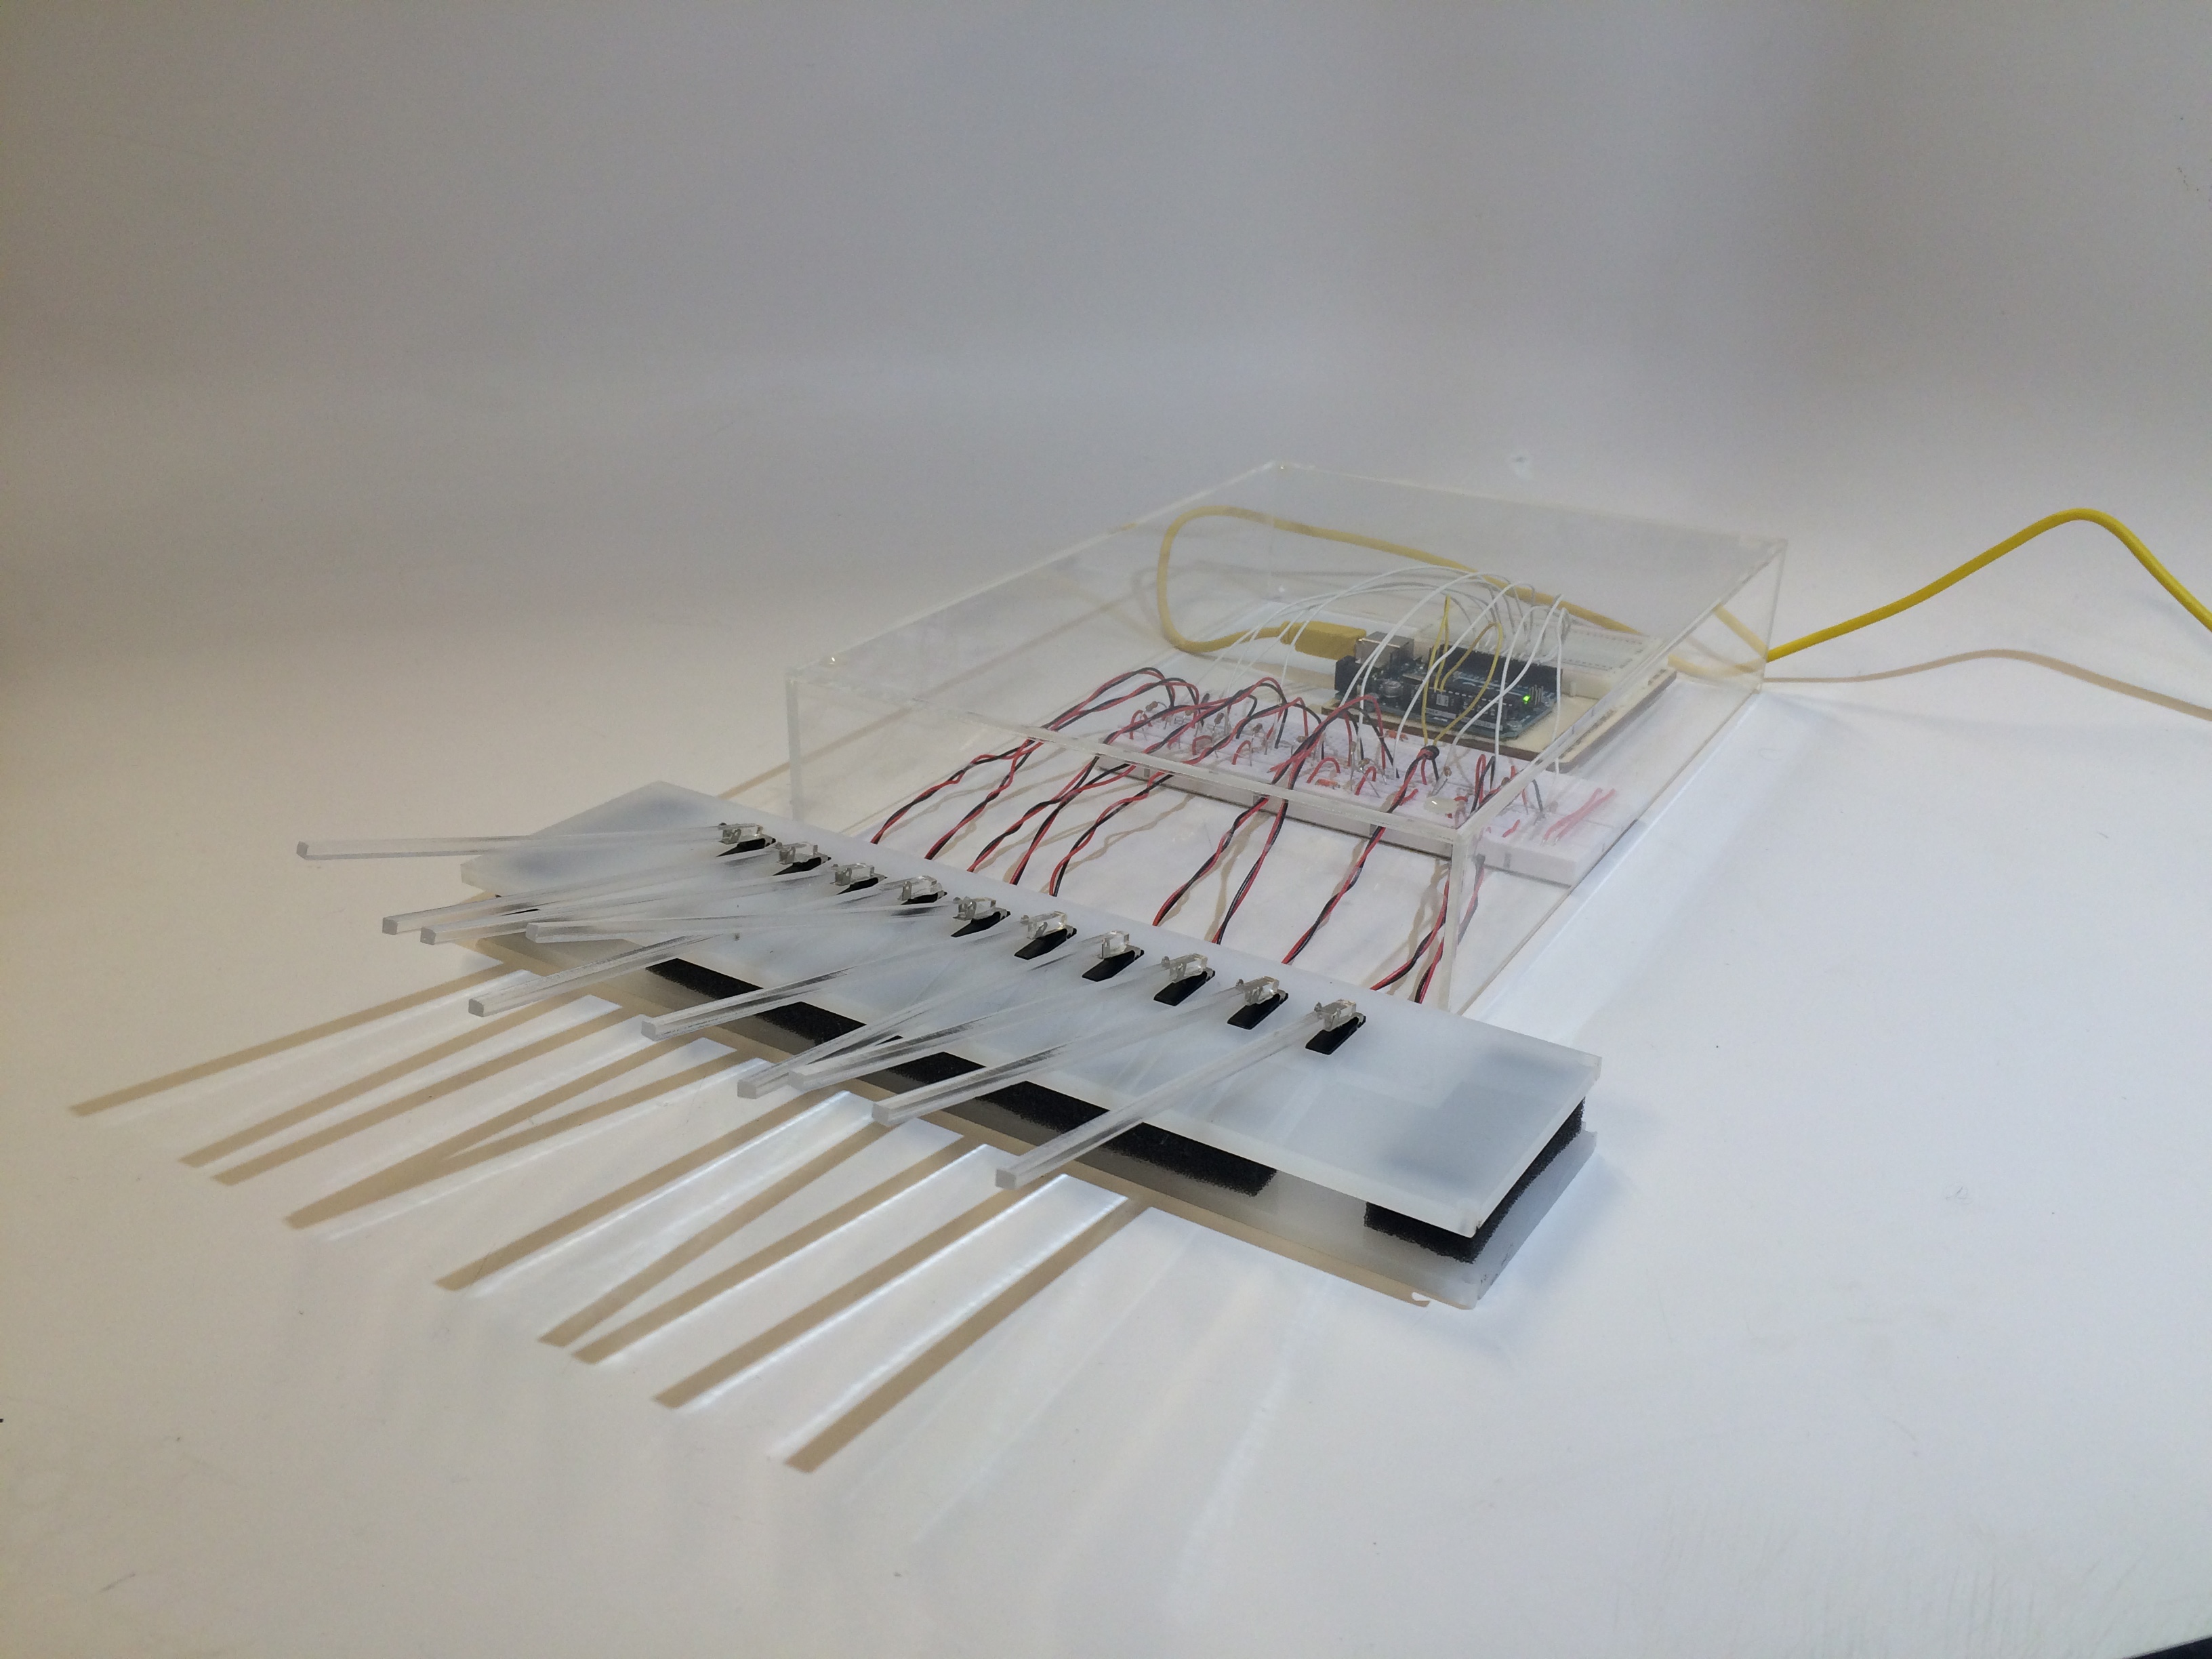
Step three: Build the hardware components.
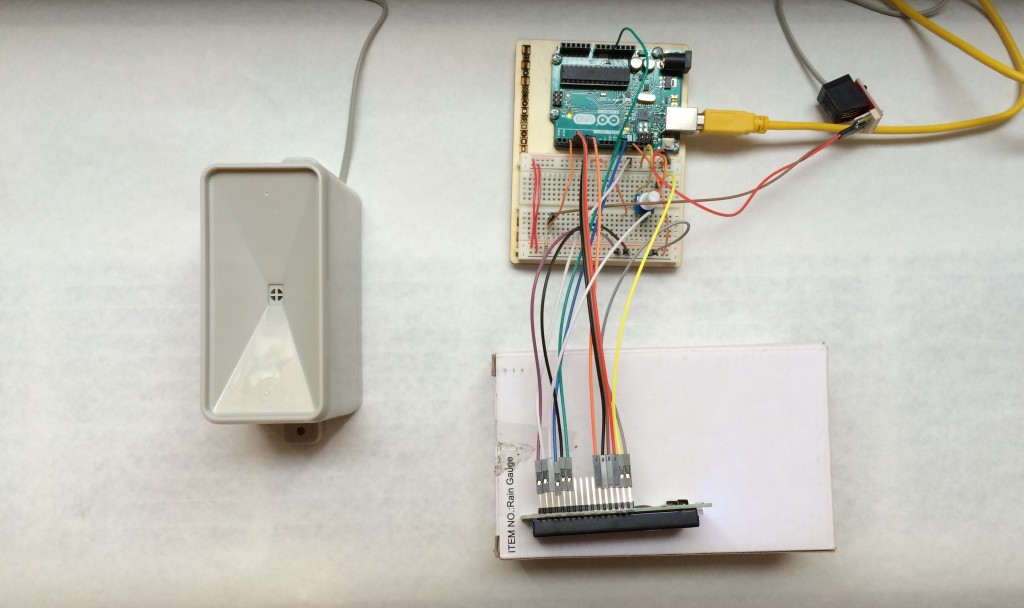
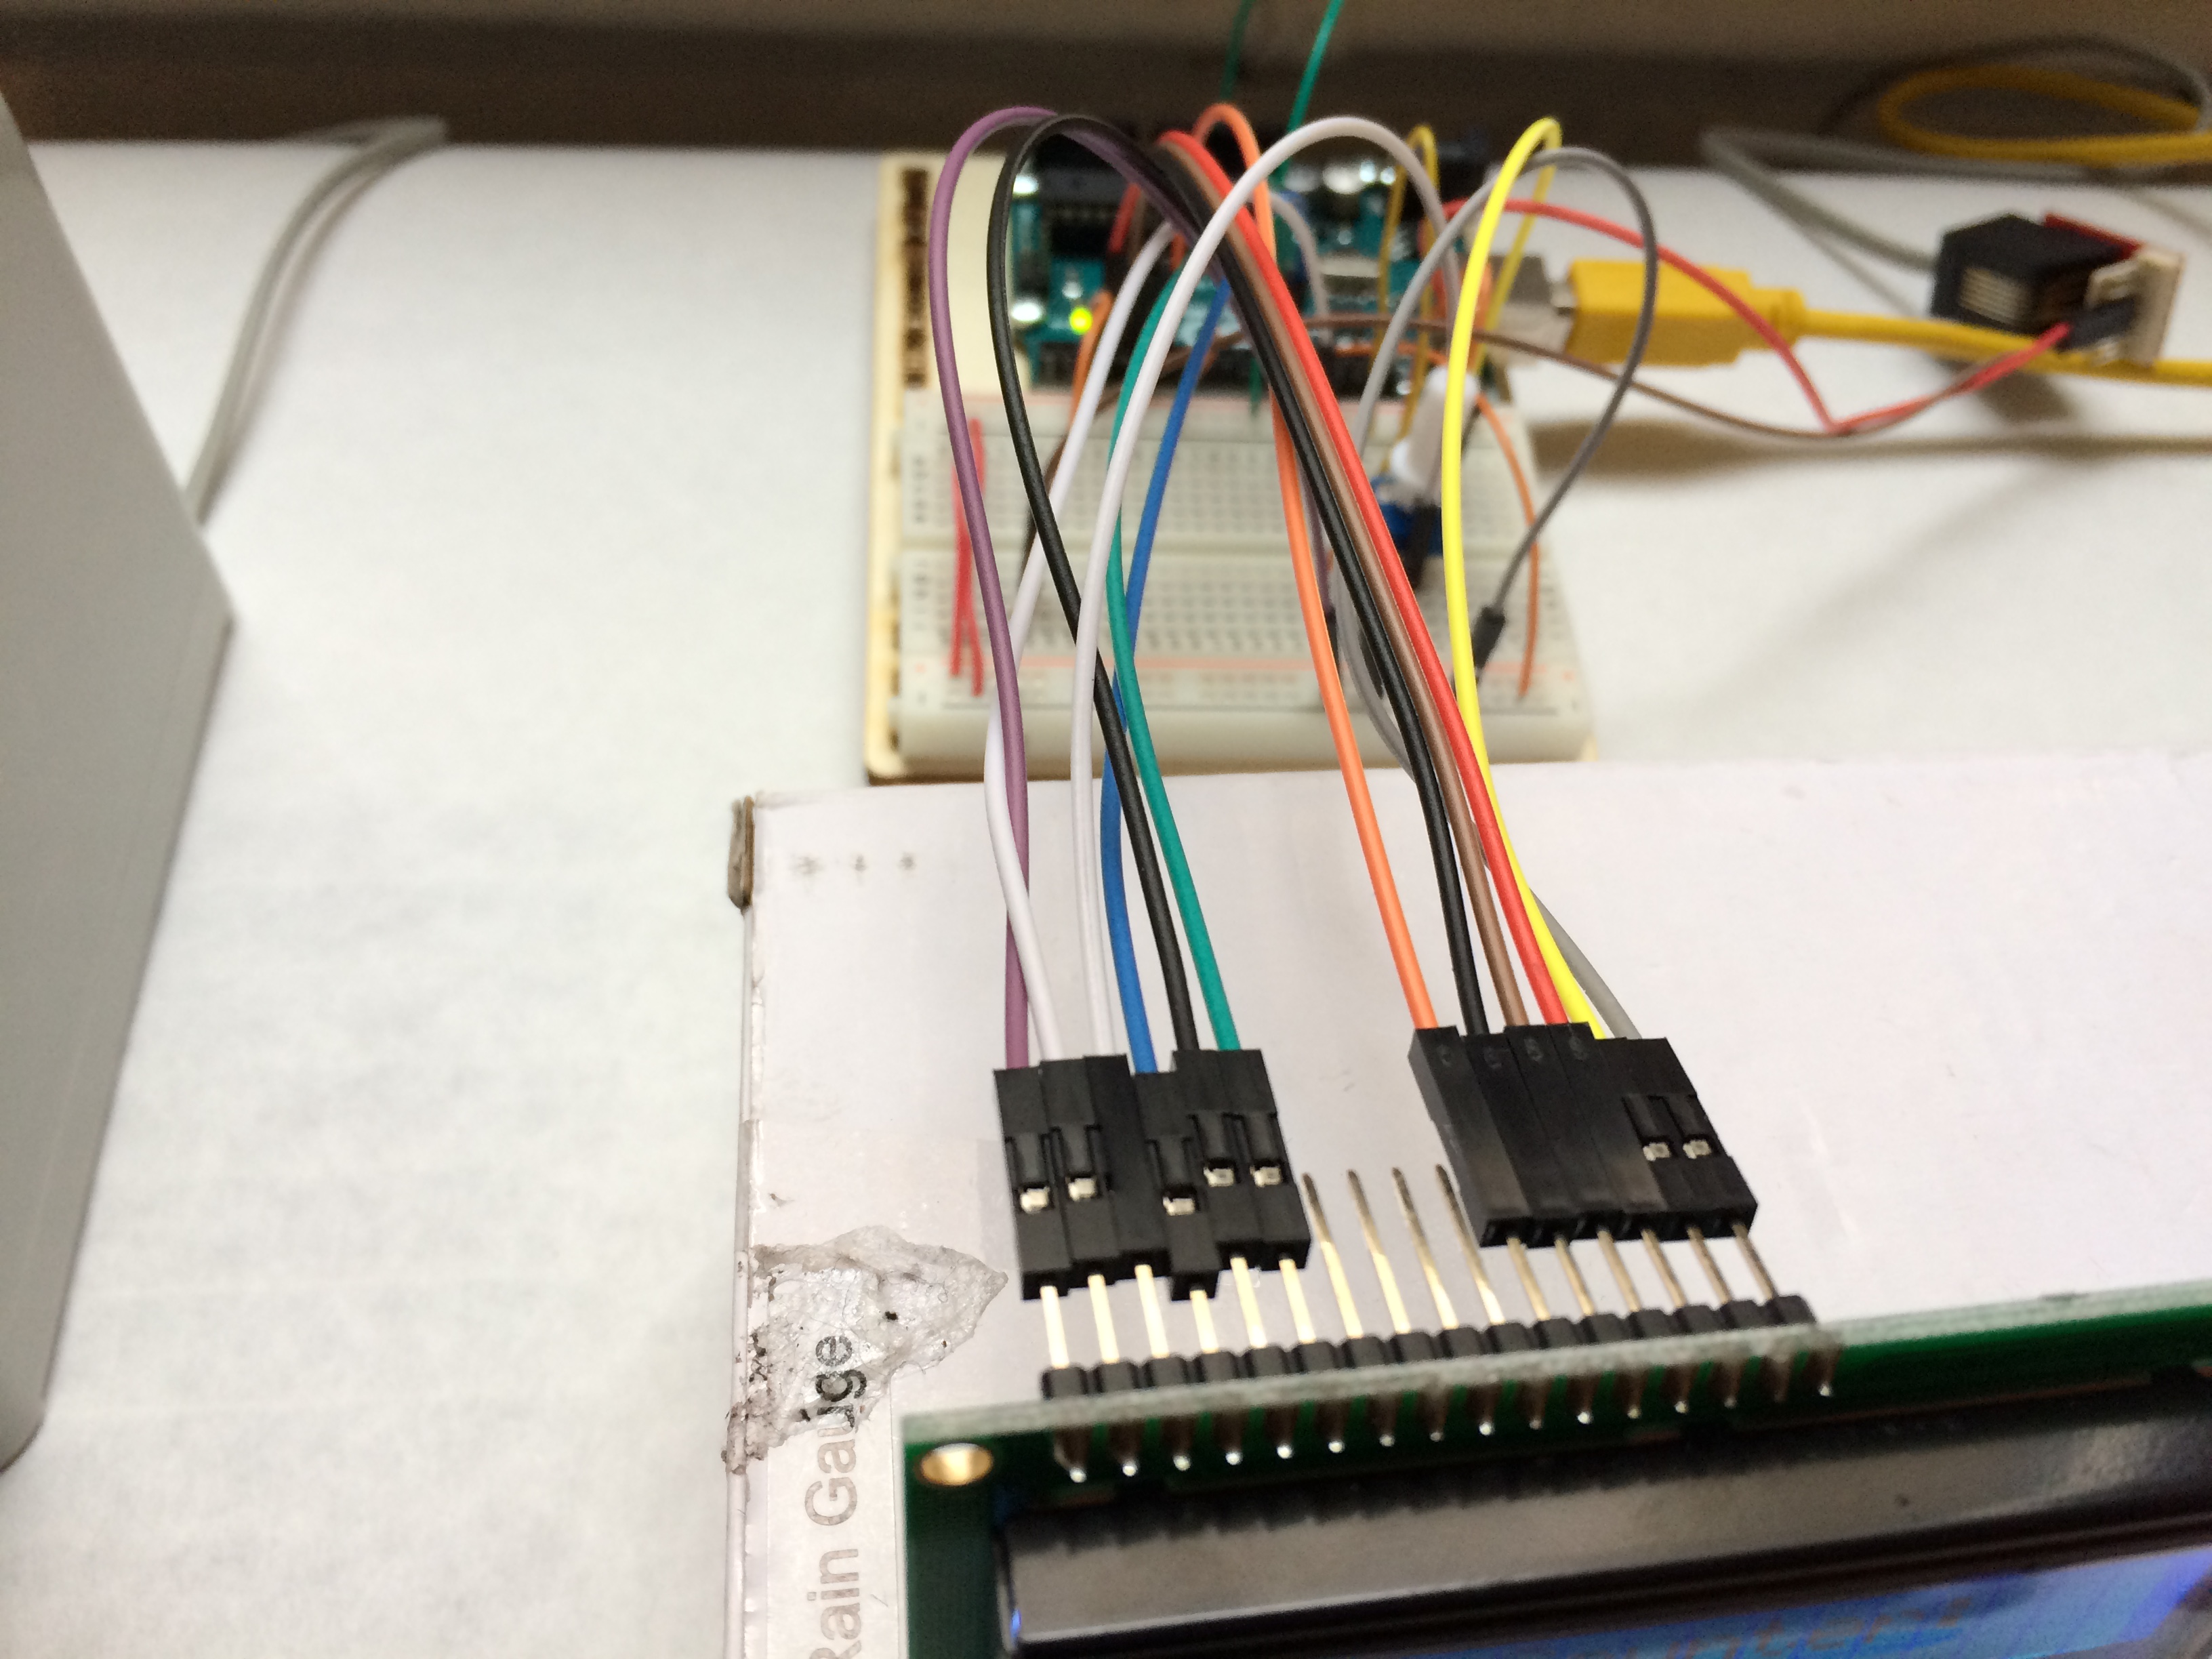
After three days of testing the waterfall, I decided to shift gears and begin building the actual switches and the circuits that would connect to the Arduino.
I laser cut some acrylic “keys” that would serve as an extension of the end switches, which the waterfall would be hitting. I also laser cut a board with ten holes to fit the switches. I soldered the switches to wires that led to the breadboard, which connected the 10 switches to digital pins 3-11.

The wires were connected correctly and I knew I would need to figure out a way to protect the hardware from getting wet. That would prove to be a really important issue if I got the waterfall to actually work.
I did like the feeling of pushing on the keys. You can push them in a wave pattern, parodying the feeling of water falling on them. It felt sufficiently tactile and I decided that since I was in a time crunch, I would have to adjust my concept slightly to account for the fact that I still hadn’t figured out the best way to make the water fall evenly.

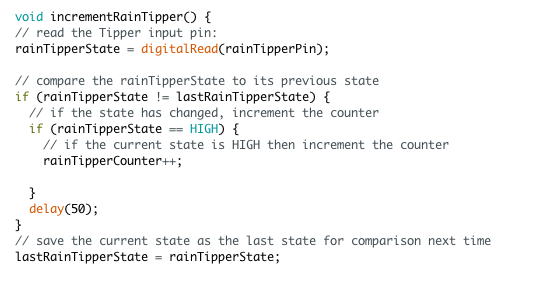
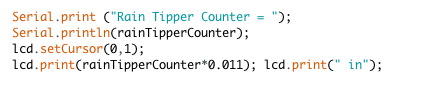
Step four: Write the code and add the sounds in p5.js.
I tossed around a few different ideas for the types of sounds I wanted to play. I thought about playing funny noises, spooky noises, water noises, human voices, and various tones, but the piece of music I kept returning to was Richard Wagner’s Vorspiel (overture) from Das Rheingold, the first opera in his Ring Cycle.
The opening of the opera is a realization of emergence, of becoming as process. Wagner was obsessed with origin stories and stripping away stories to their mythic core. Unlike Beethoven’s chaos, Wagner’s music begins with a monotonous E flat, building into more and more complex figurations of the chord of E flat major, which is meant to mimic the motion of the Rhine River, which runs through Germany. The piece lasts 136 bars and approximately four minutes.
There is something very watery about the piece of music. In his book Decoding Wagner, Thomas May writes: “The swirling textures of sound readily transmit the idea of water rushing and complement the music’s quickening into life.”
I chopped up the overture into 10 distinct “parts” that would correspond to the 10 keys. The result would be a layering of sounds as you run your hands over the keys.
